Our front door has been in desperate need of a refresh since we moved in, and I decided it was finally time. First, I totally changed the look by adding new door glass, then it was time for paint! I knew I wanted to keep our door black, but I wanted it to be a bit of a softer black than what we had to better complement our brick and trim. I chose Sherwin Williams Black Magic, and it was the perfect choice!
Painting a door is a simple project that can be done in a day and can make a HUGE impact when done correctly. Here’s how I did it!

Supplies
- One quart of paint in the desired color. I used SW Weathershield paint + primer with a deep base since I was choosing black.
- Painters tape
- Masking fluid (optional)
- Paint brush
- Smooth roller (1/4 inch nap)
- Paint tray
- Sandpaper or sander
- Drop cloth
- Degreaser
- Sponge or other cloth to clean the door
Process
- Check the weather to make sure your day has good weather conditions. You will need to keep the door open for a while after painting it!
- Prep the door for paint by thoroughly cleaning it with soap and water or a degreaser (depending on the state of your door).
- If your door has any rough spots, rust, or has never been painted before, you will want to lightly sand the whole thing. If there are cracks or other blemishes in the door, you can address those at this time with caulk or wood filler.
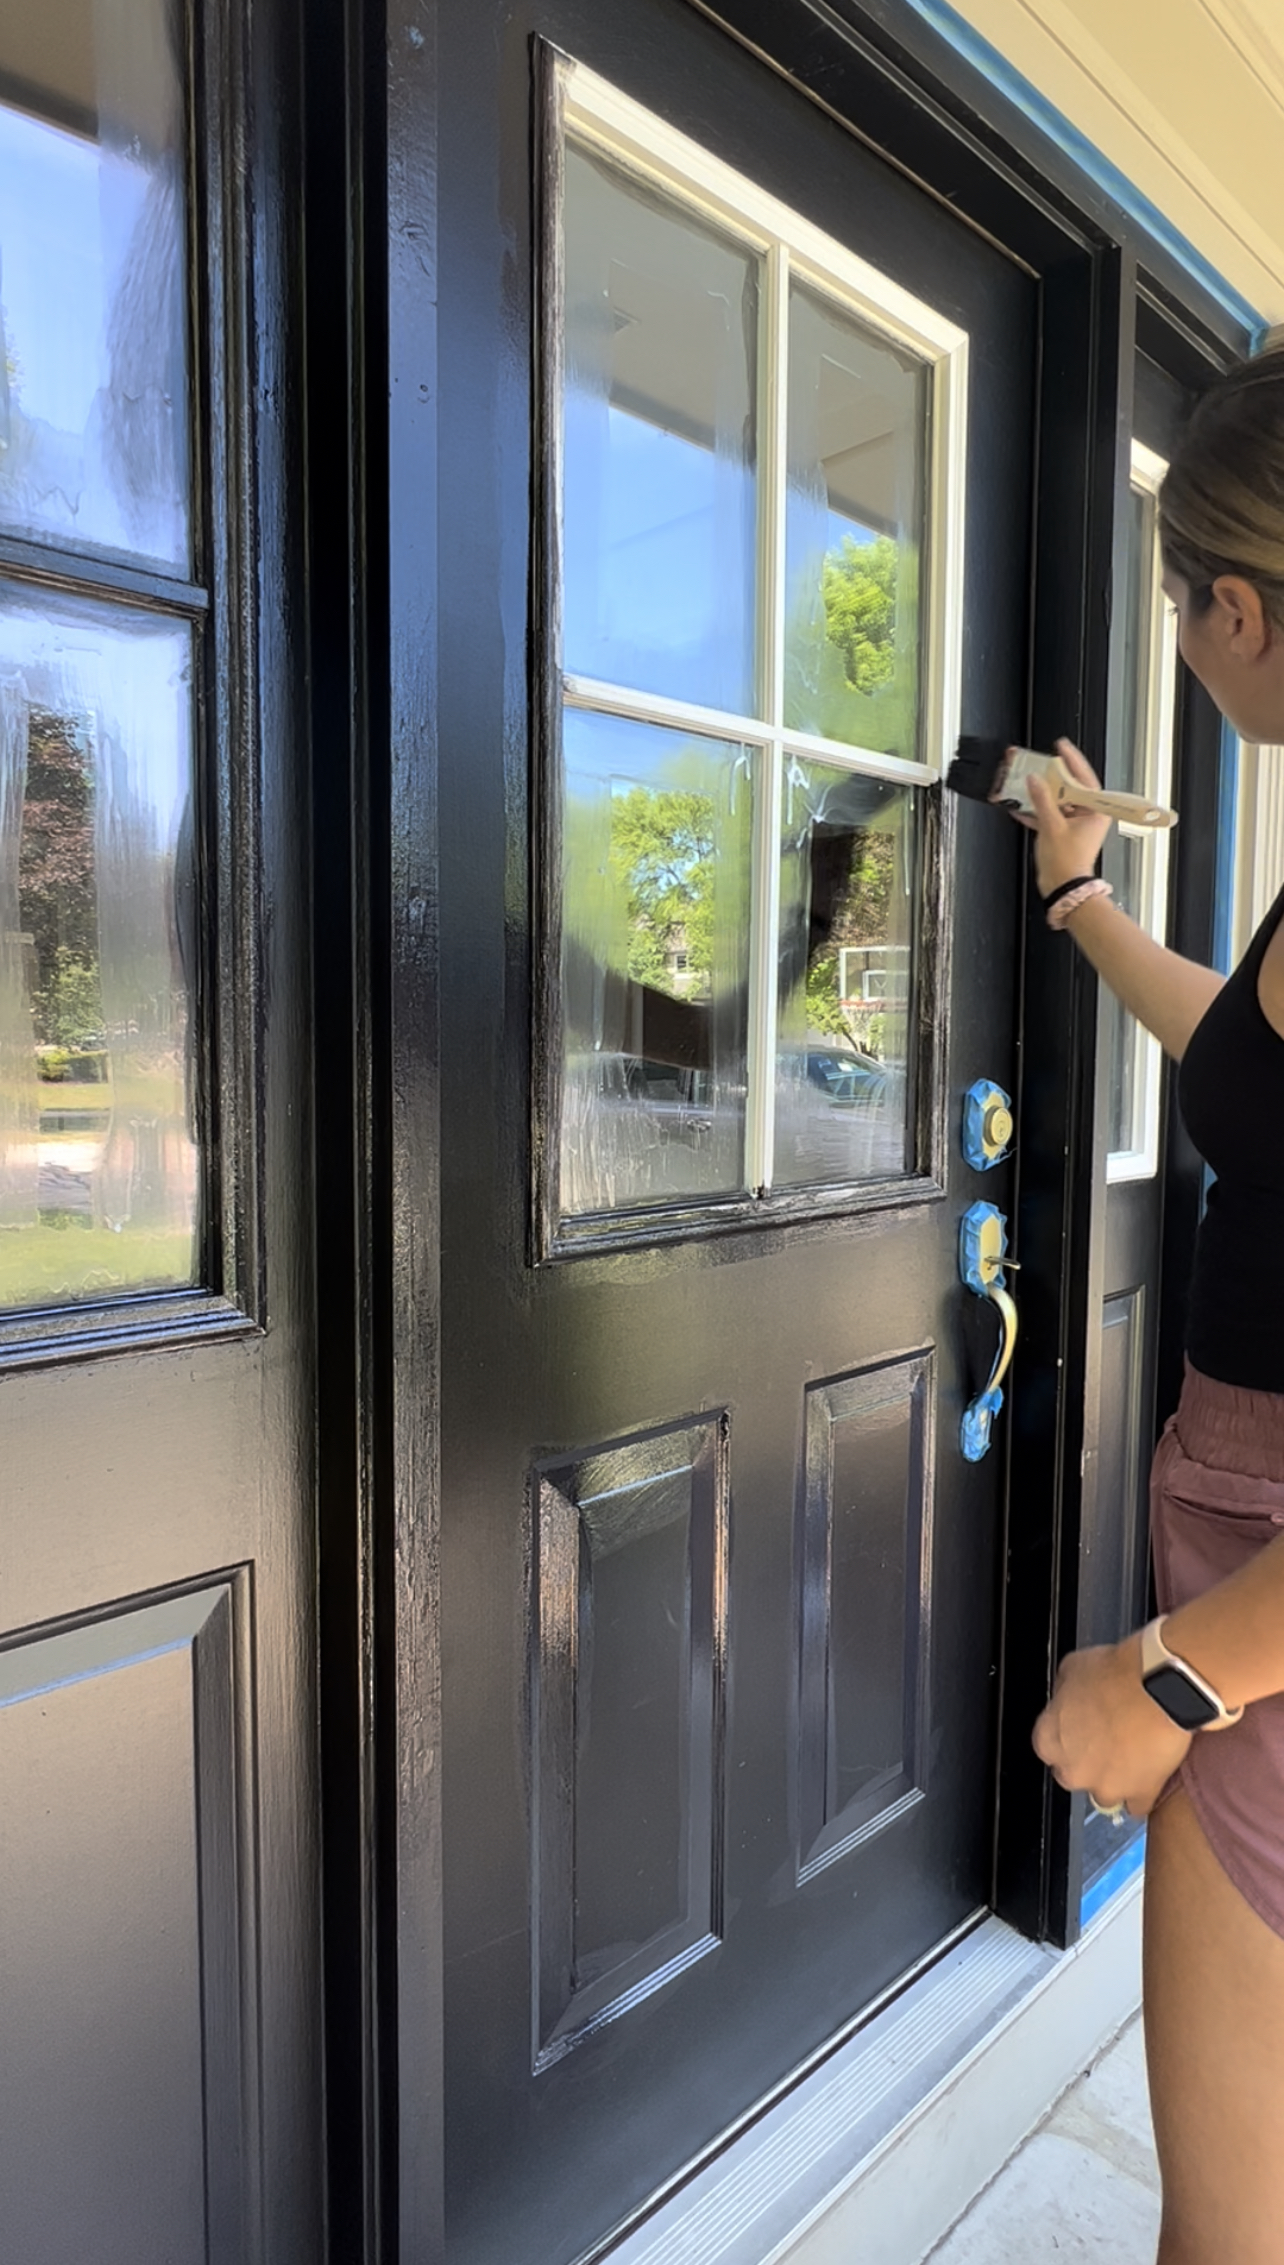
- Once the door is clean and dry, use painters tape to mask off any areas you do not want to be painted (trim, hardware, etc). If your door has glass in it, you can also try masking fluid on the glass in lieu of tape.
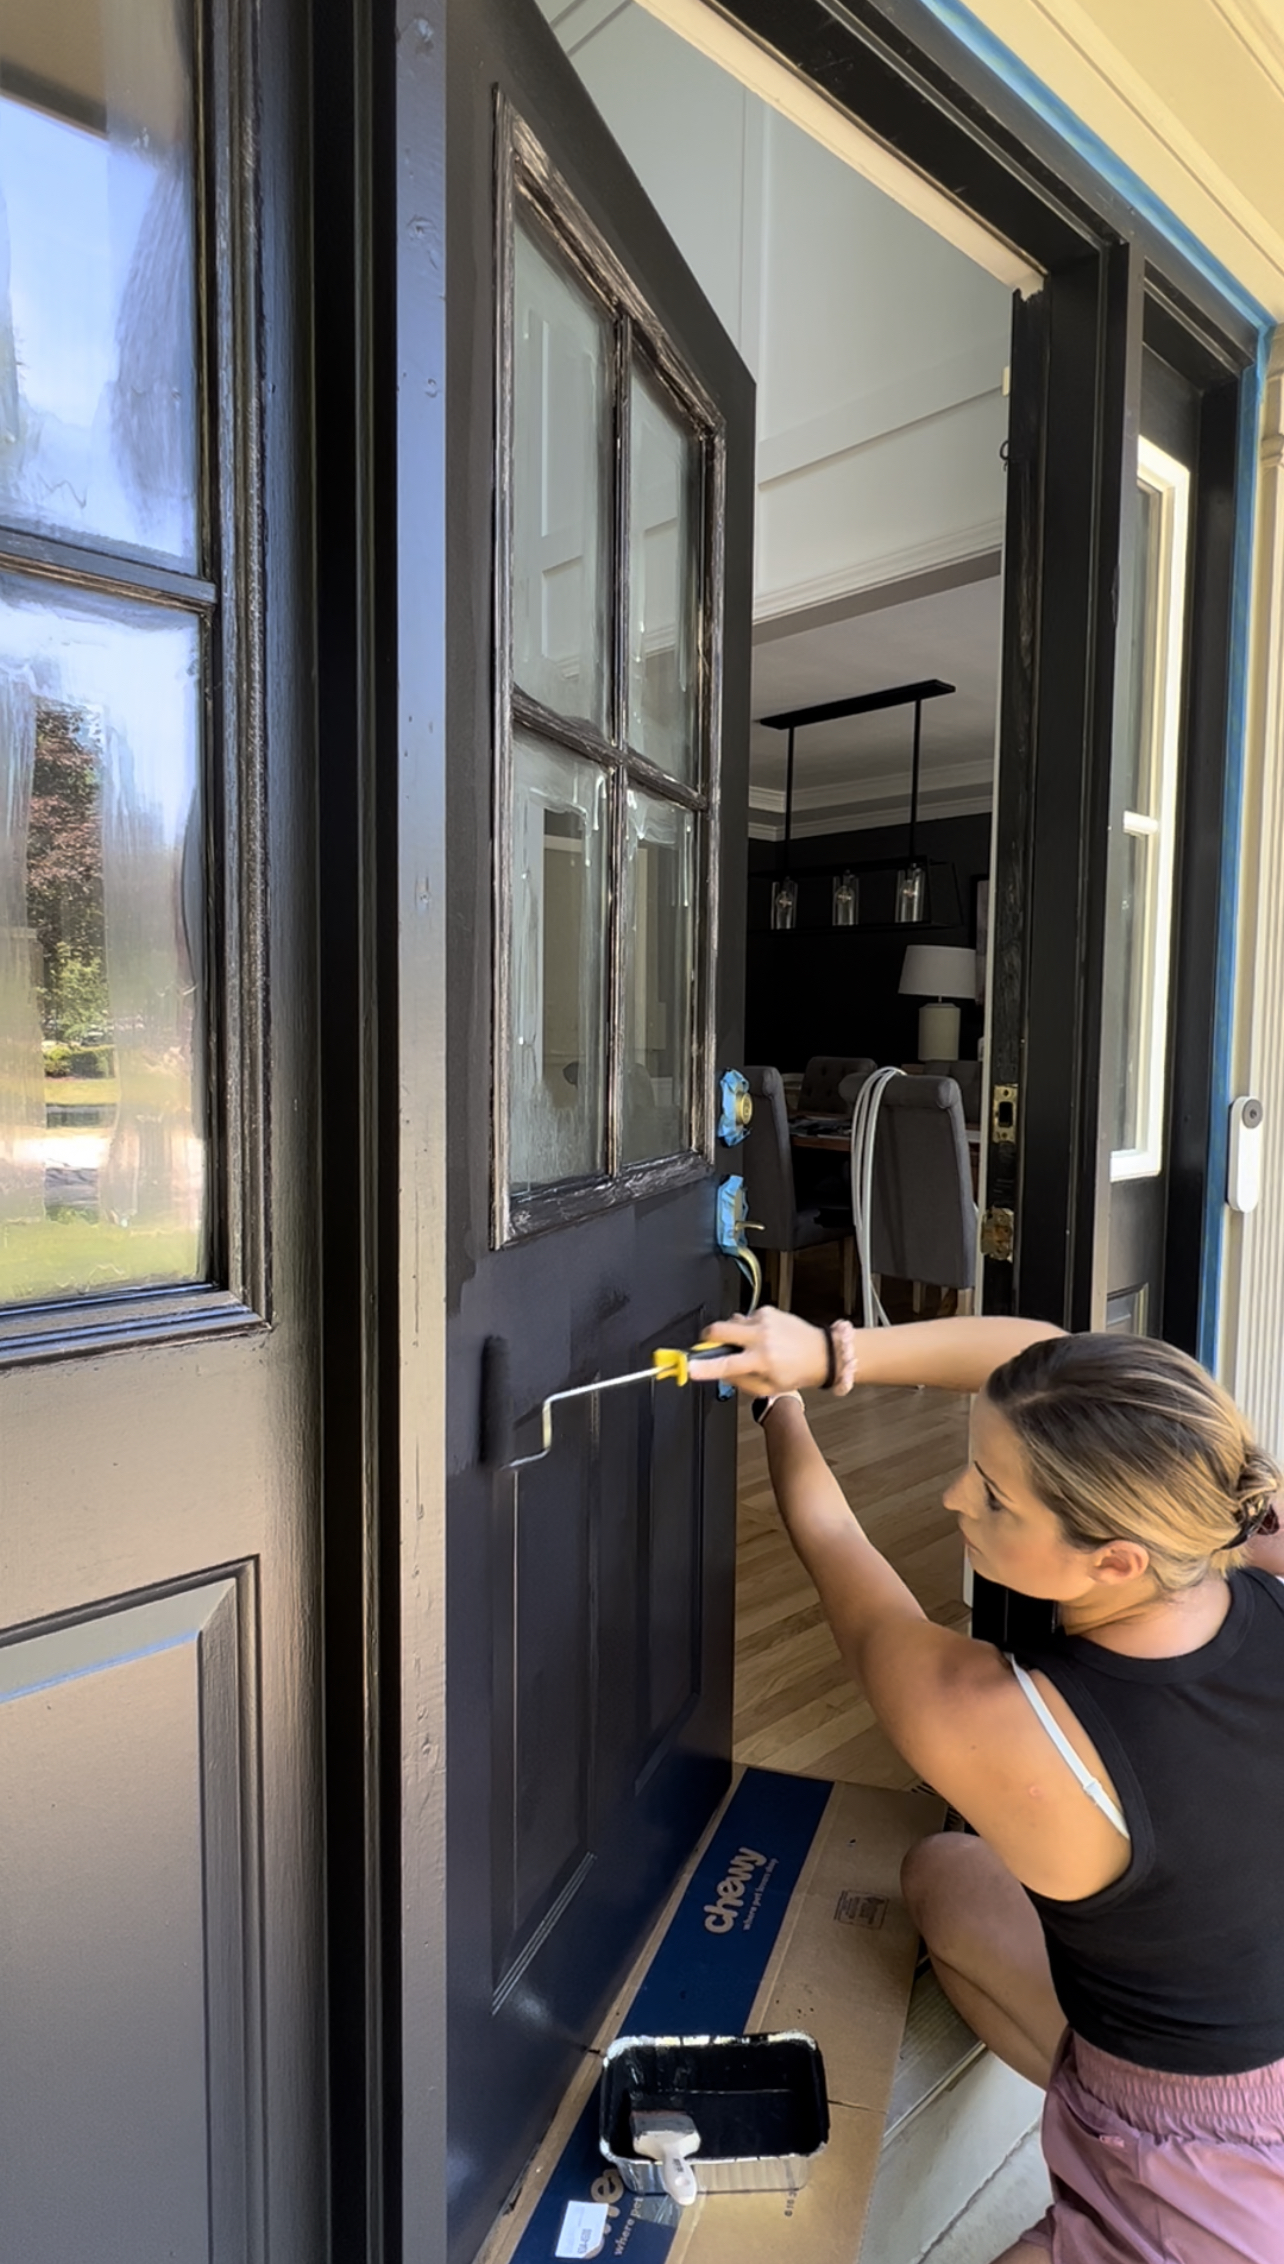
- Next, let’s get painting! (If your paint does not also have primer in it, prime the door first to ensure that the paint sticks well.) Start by painting any boxes/grooves in your door with your paintbrush and follow with your roller over the remainder of the door. Using a roller will ensure you have the smoothest finish.
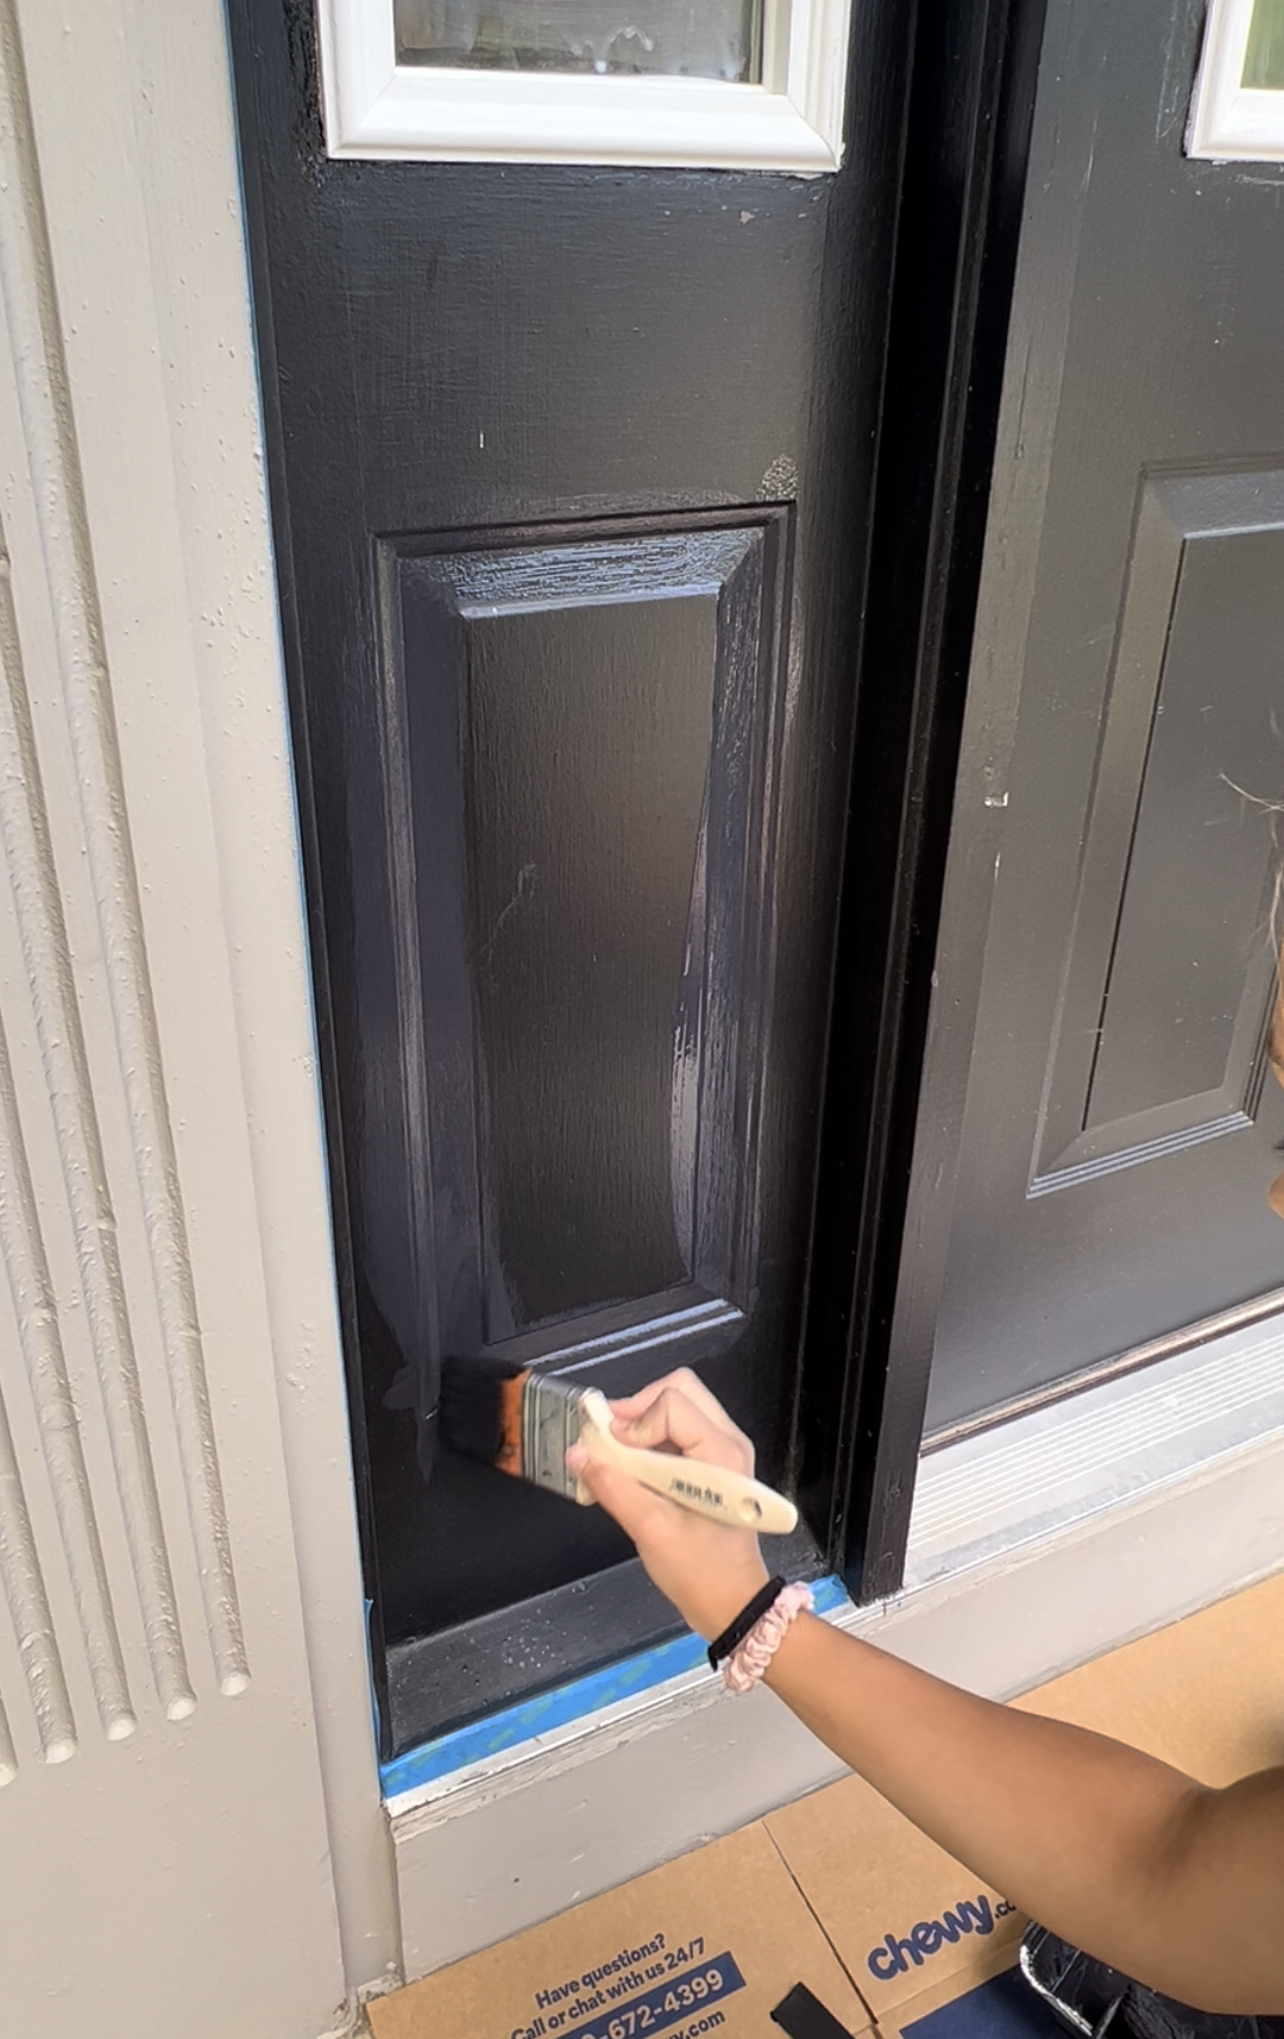
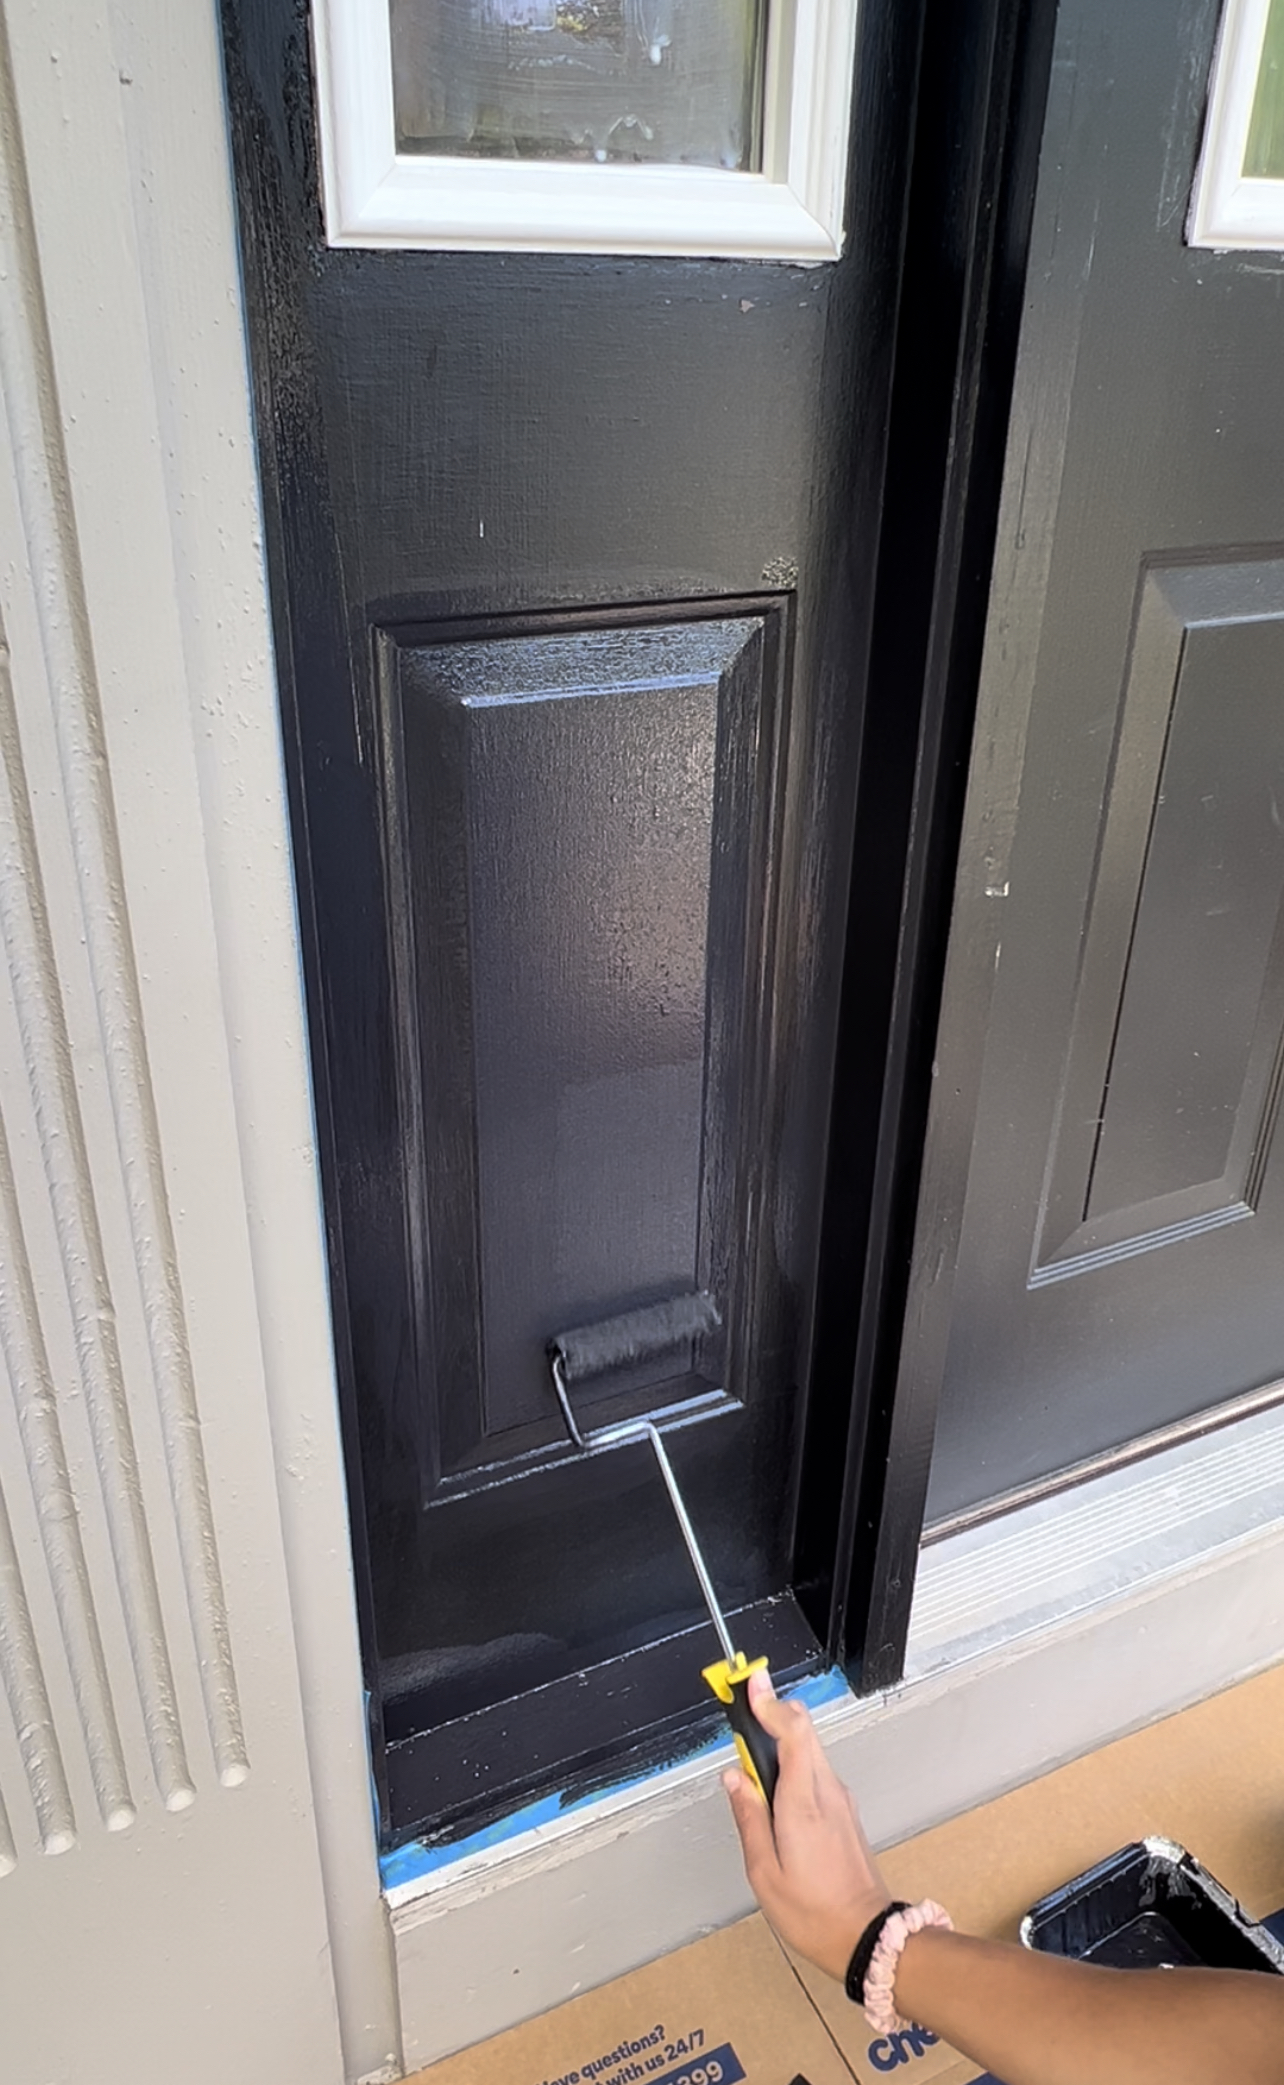
- Repeat the last step for 2-3 coats of paint (depending on what is needed for full coverage). My door was already black so I was able to get away with 2 coats, but if I was going from dark to lighter, I would probably needed at least 3 coats. The paint I used suggested waiting 2-4 hours between coats of paint.
- Keep your door propped open for as long as possible to prevent ruining the finish. A door stop is helpful for this to prevent the door from blowing open or closing by mistake. It’s best to start this project in the morning so you have more time to let it dry. I kept my door open until right before we went to bed for the night.
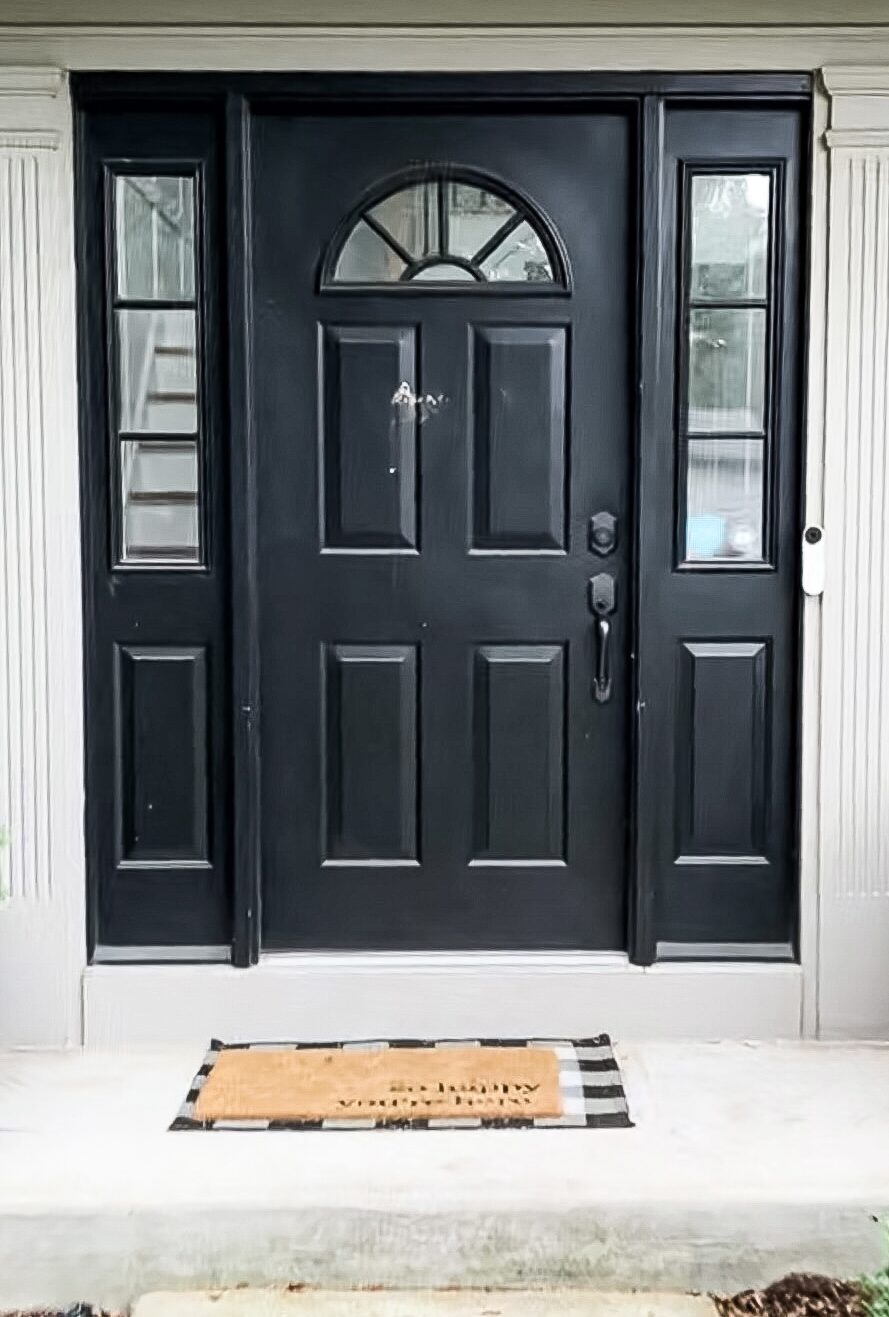
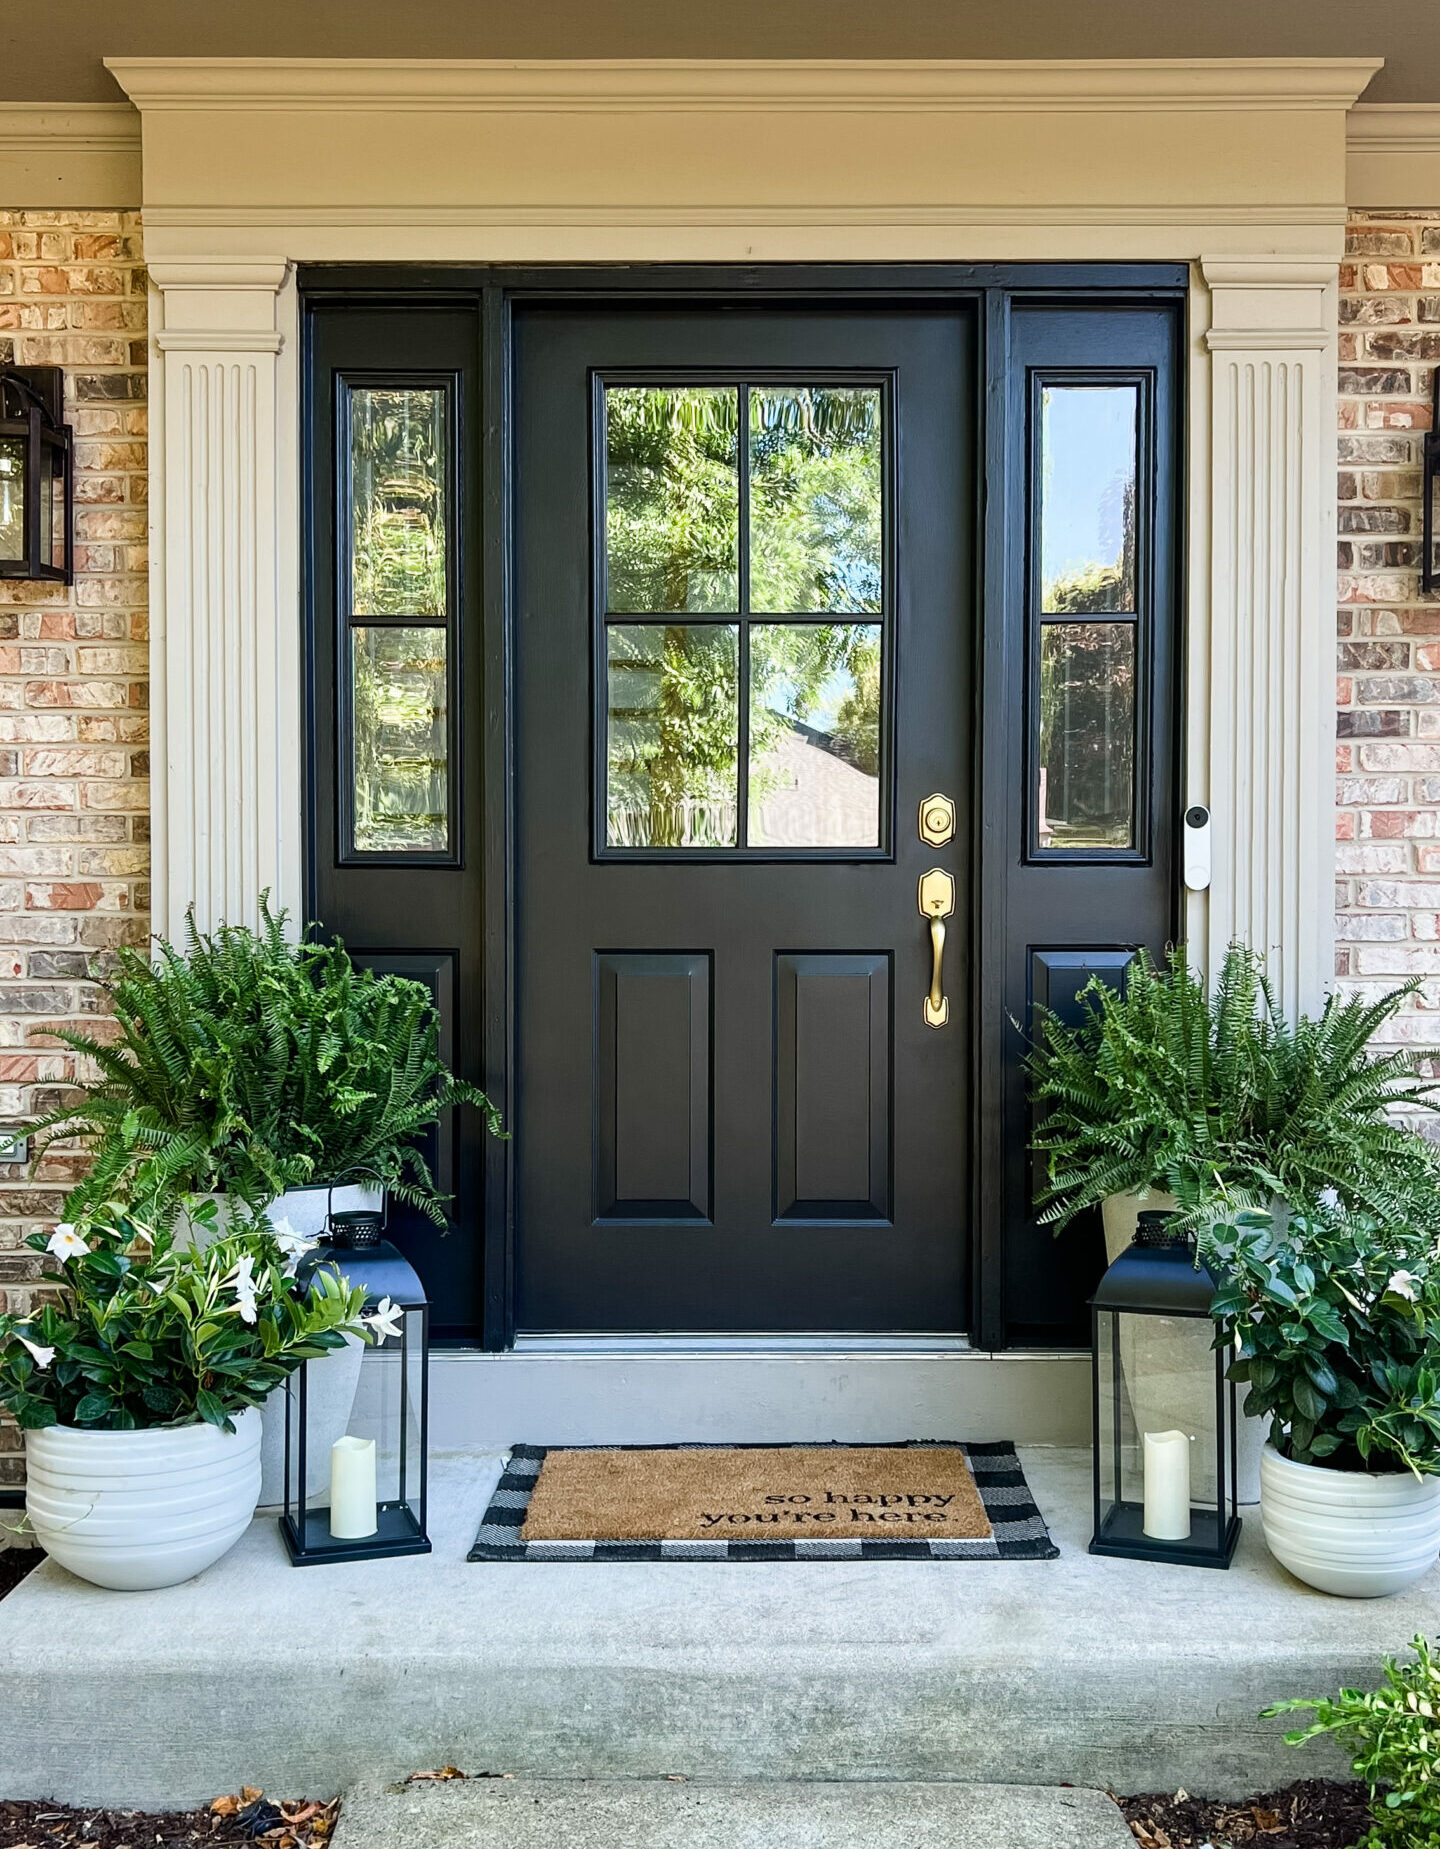
I couldn’t be happier with the result! This is such an easy DIY that makes such a huge impact to the overall curb appeal of your home!